Kale is a dark green, leafy vegetable that that comes from the same family as cabbage, broccoli, and Brussels sprouts, which are all part of the Brassica oleracea species. The stems and the leaves are usually chopped and the fruit itself makes appearances in salads, soups, stir fries, and even shakes. Kale hardly shares the nutritional profile of the counterparts and is just rich in vitamins, minerals and antioxidants that is why it has caught the eye of health conscious consumers. Within a span of last few years, kale growing has dominated now and also this is of interest of a lot of enthusiasts of garden with so much more to gain from.
In this guide, we will be taking an overview of the how to grow kale starting from selecting suitable varieties and location to harvesting and preserving your kale leaves. Therefore, let’s plunge in and begin our kale growing adventure!
Key Takeaways:
- Know the variety you want to grow and how to identify them at the market, as some kales can be so bitter that they are not edible.
- Find out if kale does best in the shade or direct sunlight, as well as the best temperature for it to grow healthily.
- Know the fact that soil preparation and finding an optimum pH for kale growth are crucial factors.
- Go through the different techniques of kale that involves seeds and transplants.
- Learn the secrets of right watering, and feeding as well as mulching for green kale plants.
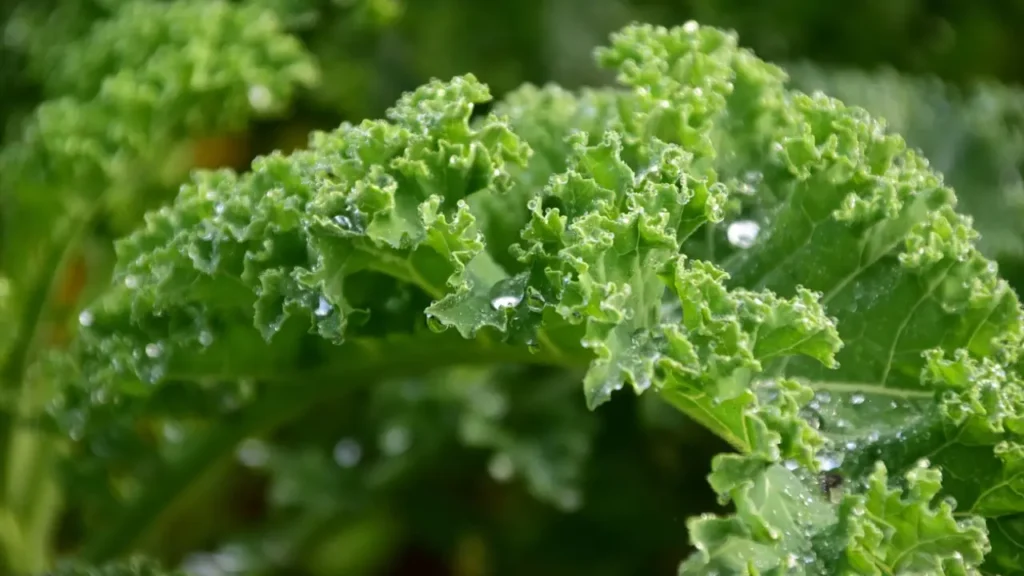
Table of Contents
Selecting Varieties
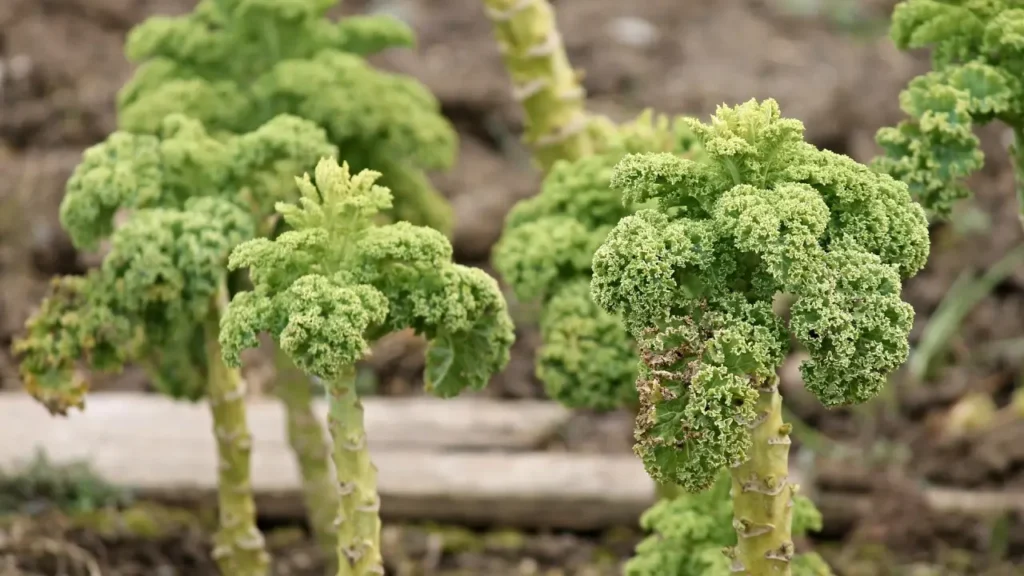
In the beginning, gaining knowledge of various kale types and variations is a must before starting the growing process.Kale belongs to the cabbage family and comes in various forms such as curly kale, dinosaur kale, and red kale. These greens are the mother lode of nutrients and come in varieties from which you can choose one of your choices.
Kale is a versatile plant that offers a range of options for culinary enthusiasts and health-conscious individuals. We will examine some commonly consumed types of kale with a bit more detail:
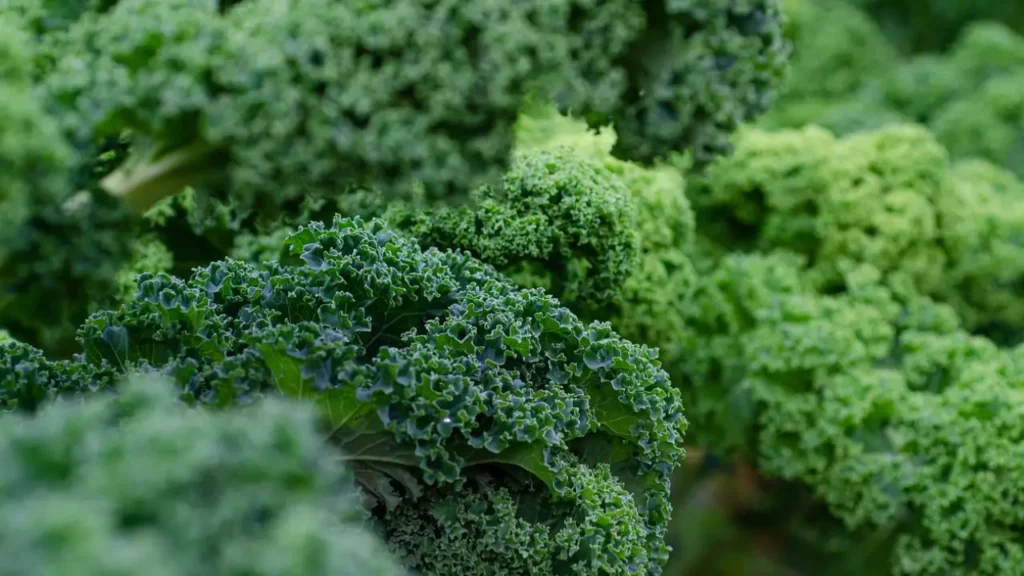
1. Curly Kale
Curly kale is perhaps the most recognizable and widely available variety. The gentle, curly, whole leaves from this variety can be used in salads as well as other dishes. When bruised the taste is a little bitter but becomes mellonated when cooked.
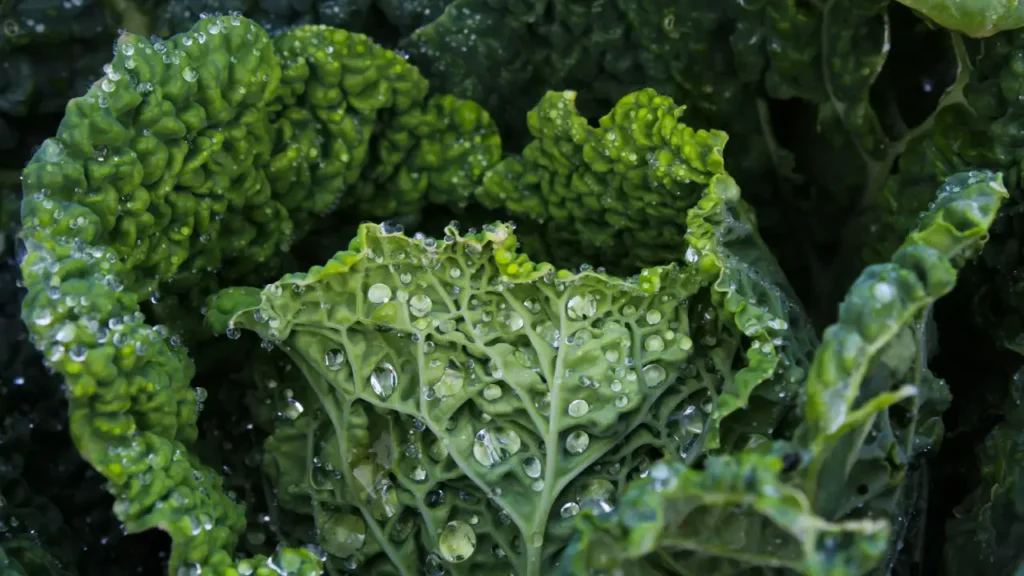
2. Dinosaur Kale
Additionally, Swiss chard is a variety of the same genus with green leaves and multicolored stems that resembles dinosaur skin. Unlike any other, it is nicknamed as the dinosaur kale or lacinato kale. However, it has a robust, almost earthy taste and a more delicate texture as compared to the curly kale. Dino kale is an essential ingredient in a wide range of soup recipes, meat stews, roasted vegetables, and now it is also available as a replacement for traditional pasta.
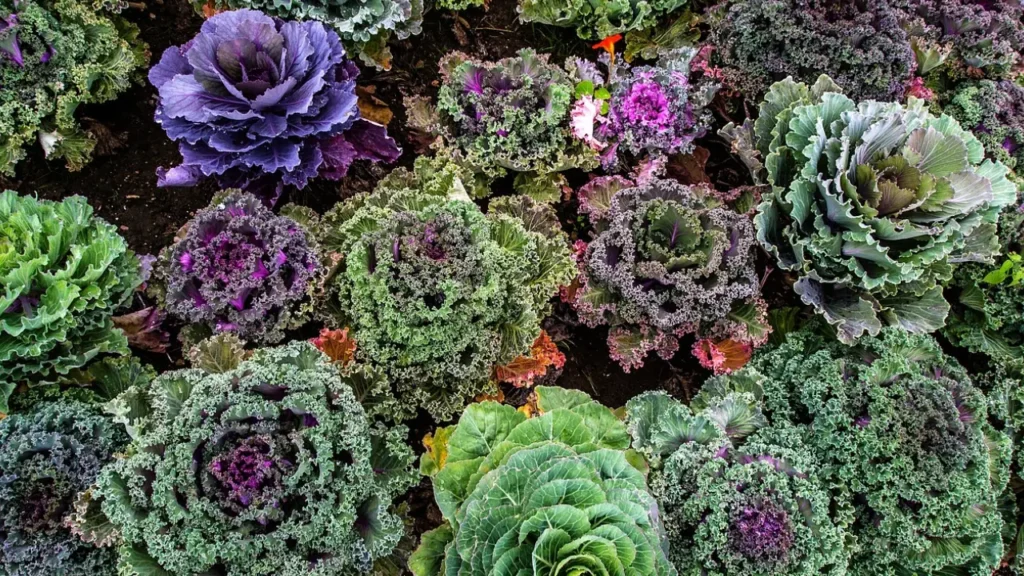
3. Red Kale
Moreover, the red kale is one of the beautiful leafy greens in the world. This particular kale variety has purple to red leaves that bring colors to any dish.It has possibly a slightly sweet and low-range taste in comparison with the other kale varieties. Red kale holds its color well even when cooked, making it a visually appealing addition to salads, stir-fries, and smoothies.
These are just a few examples of the kale varieties you can choose from. The variety of shapes and continual appearance difference imparts certain unique taste in each kind, with which all can try their personal choice.
Kale is always healthy, delicious and are rich in nutrients. Most of the times, they are very saturated in vitamins, minerals and antioxidants making them the appropriate food for an individual who loves health conscious nutrition. Whether you incorporate it into salads, soups, smoothies, or even in stir-fries, kale is a versatile and nutritious vegetable variety that brings aroma to your meals.
Choosing the Right Location for Kale
One of the important rules in growing kale is location selection, where you place your plants. Kale thrives in cool climates and requires ample sunlight to flourish. Follow this advice to determine where to plant your kale plants:
- Kale Growing Conditions: Kale demands a moderate, cool-morning and warm-afternoon temperature ranging between 40°F and 70°F (4 to 21°C). Kale thrives best in the conditions of soil which retains moisture but at the same time drains it and doesn’t allow an excessive amount of water to accumulate.
- Kale Sunlight Requirements: Enough of direct light needed to ensure the growth of the kale, is 6-8 hours per day. Pick a place that receives quite maximal light, better in the morning or in the late afternoon.
- Best Location for Kale Plants: Pick a location in the garden that has the required sunlight exposure and the well-drained soil for effective growth. Considering the treed streets that provide shade in the hottest times of the day especially in warmer climates would be beneficial.
The wise choice of where to locate your kale plants will enable you to organize the most favorable conditions for them to achieve their best growth. Don’t forget about the characteristics like temperature, sunlight, and soil drainage when looking for that ideal place in your garden.
Preparing the Soil for Kale
To ensure that the kale matures strong and the harvest is prosperous, you should perform the initial soil preparation before the plants are added to the land. Kale prefers a moderately acidic healthy soil with a pH level from 6.0 to 7.5. Spending time on soil work will produce a good fit environment for your kale plants to thrive.
Determining Soil pH
It’s better to first identify the pH level of your soil before cultivating your garden. A soil testing kit can be acquired from the garden centers or the local agricultural extension offices. It can then be sent away for analysis. This test will produce essential data that will help you know the acidity or alkalinity of your soil.
For your soil’s pH level to be defined as acidic, it should be below 6.0. It is given that to raise the acidity level, you can add agricultural lime or dolomite lime Fix on the product instructions for the adequate application rate considering mainly your soil type and test results.
On the other hand, if your soil pH level is above 7.5 inch, your soil has reached a point of being too alkaline for establishment of a kale bed. In this example, you might use such organic materials as compost, pine needles, and even coffee grounds as a means to lower the pH. The amendment of the soil, therefore, will be the keys to keeping the acidification in check and to restore the natural processes over time.
Soil Amendments for Kale Cultivation
Another thing that you need to think about is the pH level of the soil, and besides this, you also need to think about the organic matter that you incorporate in the soil to give the nutrients that kale plants require. Putting organic matter into soil creates a good micro-macro structure, the soil retains more water, and microorganisms are developed favorably.
It can be effective to incorporate matured compost or done aged manures into the soil. These exceptional organic components not only balance soil quality and fertility but also makes up the soil texture. Blend the organic matter with the top 0.6 to 0.8 feet of soil working the forks or the tiller.
Also, adding a proportional granular fertilizer to the seedlings’ soil environment can possibly provide necessary nutrients to broaden kale’s growth during its developmental stage. One solution would be to find a fertilizer that is designed to work with leafy greens or if you are fine with a general-purpose fertilizer you should consider one that is organic. Indicate resources that help you get specifics about quantity and application method.
Through the adjustment of soil’s pH to optimal levels, until you get organic matter and perfect amendments your bed will be fertile and nutrient base enough for kale plants to be able to succeed. We will take time to ensure that everything is planted perfectly and in place if we do this, we will produce plenty of harvest in the end.
Starting Kale from Seeds or Transplants
Kale either can be grown from the seeds or transplants whichever you prefer, or what resources you have available. Every approach would be good at its place, so we will get into them both to provide you with the necessary information to pick the proper way of starting your kale garden.
Starting Kale from Seeds
If you choose to start kale from seeds, you have two main options: either direct sowing or indoor starting at an early age.
Direct sowing: The aim of this procedure is to sowing the kale seeds in the open soil area of your garden. Get the soil ready by removing any weed and breaking up directly with a garden fork or taking a hoe. Plant seeds by making shallow furrows into the soil and follow the sowing instructions noted on the packet searching stand even spacing between each seed. Lastly for the seeding type, cover the seeds with a thin layer of soil and then hands will gently pressed down over it to make it firm.
Indoor start: Indoor setting is a common strategy that ensures your plants receive a boost before going outdoors and being transferred to the garden. Put some seeds to the trays or small pots filled with a light mix of seed starting mixture. Depending on the variety you have, sow the seeds in a row ¼” deep and then cover them with a tiny bit of soil. Maintain the trays or pots in a cozy and sunny spot, like the window sill or under the lamps, for instance. Keeping an even amount of water in the soil is very important; therefore, it is advisable to mist or water very gently.
Once the seedlings have developed their second set of true leaves, usually after 4-6 weeks, they are ready to be transplanted outdoors.
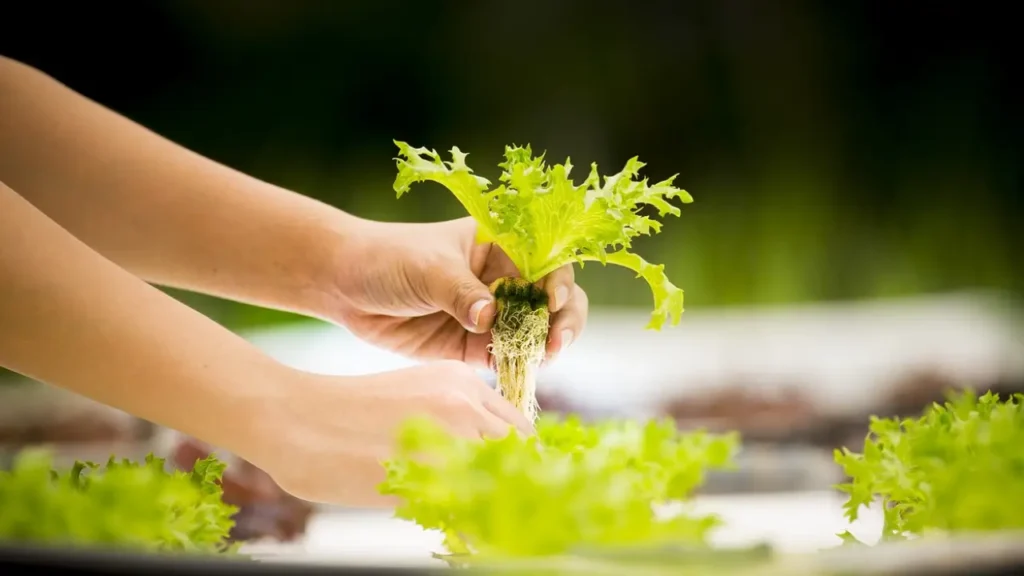
Planting Kale Transplants
If time and convenience are among your priorities, then planting kale seedlings (are good as well). Transplants are kale seedlings that are already a few weeks old and were started indoors or purchased in a nursery.
Purchasing kale transplants: Healthy and disease-free kale transplants from reliable suppliers will guarantee you strong plants you’re looking up on. Note the firmness of stems, healthy leaves, and any indications of pests or diseases to avoid. You may now purchase the kale variety in order to satisfy your taste preferences.
Planting transplants in prepared soil: Soil preparation is necessary prior to sowing seeds removes any existing weeds and incorporates organic matter if needed. Dig holes which are little deeper and wider than the sizes of the root balls of the transplants. Beat the seedlings out of the containers by hand and bury them into the holes. Soil backing to breach it ad rounding of the roots. Water the transplants very well so that they will get properly settled now.
The choice of where to start your kale seedling is a matter of personal preference and the availability of certain materials. You can either start from seeds or transplants but good gardening practices which include proper sun exposure, the right amount of water and suitable plant nutrition should be followed. Proper care and attention will ensure that your kale plants will be healthy and fulfilled with a season’s worth of nutritious [or] delicious leaves.
Proper Watering Techniques for Kale
Plenty of water not only for sake of healthy and prosperous performing your kale plants but for the purpose of growing is of great importance. With growth being the key change, it is always apt that the watering techniques should be right. The following are pointer that can be followed to appropriate the moisture level needed for your kale.
- Keep the soil consistently moist: While kale requires moist soils, it does not curl when soaked in water as opposed to other vegetables. Insert the finger vertically into the soil about one centimeter deep, and check the moistness of it at frequent intervals. If it becomes so, our task is watering.
- Water deeply: When watering, ensure that enough amount or volume of water is added to entice the roots to grow deep as well. It is thus instrumental in this regard that the plants are able to establish a solid root system, and later, access the water even during dry periods.
- Monitor moisture levels: Track the soil moisture on a regular basis for ideal wetness. Not letting the soil get completely dehydrated, is a must, as this may cause strain the plants and prevent them from growing.
- Adjust your watering schedule: The amount of watering required by kale may vary due to environmental factors such as weather conditions, depending on whether the plant is in early, mid- or late-growth stage. If you see the wilted leaves or rapid soil drying, you should adapt your watering schedule to the indicators.
Recall in this consideration that the best choice is to underwater rather the opposite e.g. over watering your kale. This may cause the root decay and bring about, other problems. Through these watering techniques, you are going to help your kale plants to get exactly the amount of water they need so that they can see great improvement.
| Signs of Under watering | Signs of Over watering |
|---|---|
| – Wilting leaves – Dry soil – Yellowing or browning of leaves | – Yellowing leaves – Mushy or rotten roots – Foul odor from the soil |
Nutrient Requirements for Kale
Kale plant is highly particular about the nutrients than any other plant since it is very sensitive and prone to quick deterioration. One of your effective means to support your kale crop to foster superb growth with the highest nutritional content is by supplying it with proper nutrition. It is crucial to ensure your kales are getting the following:
1. Use a Balanced Organic Fertilizer
For the nutrients of kale, the ideal fertilizer will be the balanced organic type that is tailored for leafy greens. Therefore, strive to use fertilizers of NPK rate of 5-10-10 or better. In this way, we will create a balance in nitrogen (N),phosphorus (P) and potassium (K). Upon application, be sure to follow the guidelines on the package, using it to create a circle around the base of the plants where you need to water them.
2. Incorporate Compost
Compost, as organic matter and basic substances, is among the best feeders for kale plants. Before planting, fully mix the soil with well-rotted compost in order to give that the soil provides with it a slow release source of the important nutrients it needs. Apart from that, there is possibility to add compost throughout the growing season to facilitate continuous nutrient uptake. You could also do that.
3. Feed Regularly
Deliberate soil feeding should be administered to promote optimum kale development and nutrient content. Give feeding supplements at a weekly rate during the growing season. It guarantees sufficient nutrient supply to plants for better kicking off the leaves formation and the overall vigor of a plant in general.
Make sure you follow the directions of fertilizer sort and let it not evoke over-fertilizing, which thus will cause the shoots growing without needed nutrients.
The saying “proper nurturing is the key to grow nutritious kale” will always be accurate. Organic balanced fertilizers combined with compost comes handy to properly supply the vital materials.
Hence, you will be able to play along the following recommendations such that your kale patches will have the best nutrients ever leading to better growth and flavor. To avoid kale crop failure, cater adequately to your plants’ food requirements, and you will come back smiling with a crop of beautiful, large leaves that are useful in many culinary recipes.
Mulching and Weed Control for Kale
Mulching plays an important role that firstly, helps reduce weeds, but also gives kale plants other crops that they need in this process. A kale planting can be augmented with an organic mulch to help beat weeds, conserve moisture and maintain soil temperature levels.
Weed control, in addition to being one of the main benefits in mulching the kale plants, is also an advantage in itself. The mulch functions as a filter, halting germination of weeds and thus helping kale plants flourish by joining forces and getting better coverage of nutrients and water in the soil. This means that you have a much reduced need for hand weeding thus saving you time and effort such that you will need to use very minimal effort for kale garden maintenance.
Besides, the mulching might help the soil to hold water keeping it from evaporating quickly. This is especially true for kale as it prefers the soil to be evenly moist. Hence, watering should be done frequently. The mulch in place functions as an autonomous protective cover, as it yields less moisture evaporation and as a result, kale plants have a steady water supply.
More so, mulching maintains soil temperature homogeneity, especially for regions that undergo the fluctuations in weather conditions. It maintains the earths temperature cooler in the days of heat and warmer during the nights of cold. Such consistent temperatures at low level suits well-growing conditions for your kale plants hence they can grow at full potential.
While mulching, you can use organic matters, like compost, straw, and grass clippings. Apply a cover of mulch 2 to 3 inches thick and do not cover the biomes with mulch. This enables air turnover and especially prevents mulch from oxygen starvation without which plants won’t do well.
In short, mulch is a convenient technique to be done on the kale garden and it works in suppressing weeds, conserving soil moisture, and minimizing soil temperatures. One method you might consider implementing is mulching, which can improve environmental conditions and give your kale plants the right conditions to thrive.
Protecting Kale from Pests and Diseases
Catering to kale is no different than gardening, you have to maintain it free of pests or diseases that otherwise may prevent yield. To guarantee the health and freshness of kale plants, one should be cognizant of regular kale pests and diseases plaguing the plant and adopts regulated organic pest control techniques. Regularly observe your kale plants, taking precautions for pest occurrences, to cultivate an invigorated and robust kale garden.
Common Pests of Kale
Kale can be attacked by many pests that can ravage the leaves, the growth, and in worst cases, a kale plant can be killed by it. Some notorious pests that cause a lot of problems to kale are:
- Aphids: These minute, exceedingly soft bodied insects have been linked to stunted growth, and also to the transmission of diseases.
- Cabbage worms: Inside their chrysalis stage, the caterpillars of cabbage butterflies, also known as the cabbage worms, eat holes in the leaves of kale.
- Slugs and snails: These slimy critters munch on the leaves, leaving behind a tattered path of destruction.
Effective Pest Control for Kale
For the sake of saving your delicious kale, it is essential that you take organic methods of pest control which will have no adverse effects to the environment and your health. Below we will give you the list of best stopped-control actions to be used.
- Handpicking: Monitor your kale every once in a while and curb those pest activities manually. This method is terrible against big insects like caterpillars and snails.
- Companion planting: You could grow companion plants that repel pests like marigolds, mint, and garlic around your kale to avoid most pests attacks.
- Neem oil spray: The spraying of neem oil can provide control for the majority of pests commonly found on kale especially the aphids.
Common Diseases of Kale
Kale crop may also fall ill to different illness, which destroy the productivity by reducing its yield. Diseases that be encountered with kale are:
- Downy mildew: This fungus produces yellow spots on the leaves and causes shortening which causes permanent damage to the food products.
- Black rot: Identified with yellow V-informed dots on the leaves, black rot may result in damage (leaves wrenching and dropping off).
Preventing Disease in Kale
The preventive measures can help you downplay the risk of diseases related to your kale garden. Consider the following strategies:
- Rotate crops: It is wise not to plant kale in the same place over and over again so that you may reduce the chance of diseases caused by soil.
- Space plants properly: Put very slight distance between kale plants because this will allow good air flow and stop disease spreading.
- Maintain plant health: Make sure your kale plants get adequate watering, maintain good balance of nutrition and remove the leaves that have any peculiarities in them in order to avoid the disease spreading further.
Common Pests and Diseases of Kale
| Pests | Effects on Kale Plants |
|---|---|
| Aphids | Distorted growth, disease transmission |
| Cabbage worms | Holes in leaves |
| Slugs and snails | Feeding damage, slimy trails |
| Diseases | Effects on Kale Plants |
|---|---|
| Downy mildew | Yellow spots on leaves, stunted growth |
| Black rot | Yellow V-shaped lesions, wilting, leaf drop |
| Clubroot | Swollen, distorted roots, stunted growth |
Harvesting and Storing Kale
The proper timing of kale harvesting is the basic of that you can have a pleasure to take it at its top taste and benefits. The right way of picking off kale leaves and storing them will result in having fresh kale for a longer period of time. The technique of kale leaves’ harvest and storing them will make it possible.
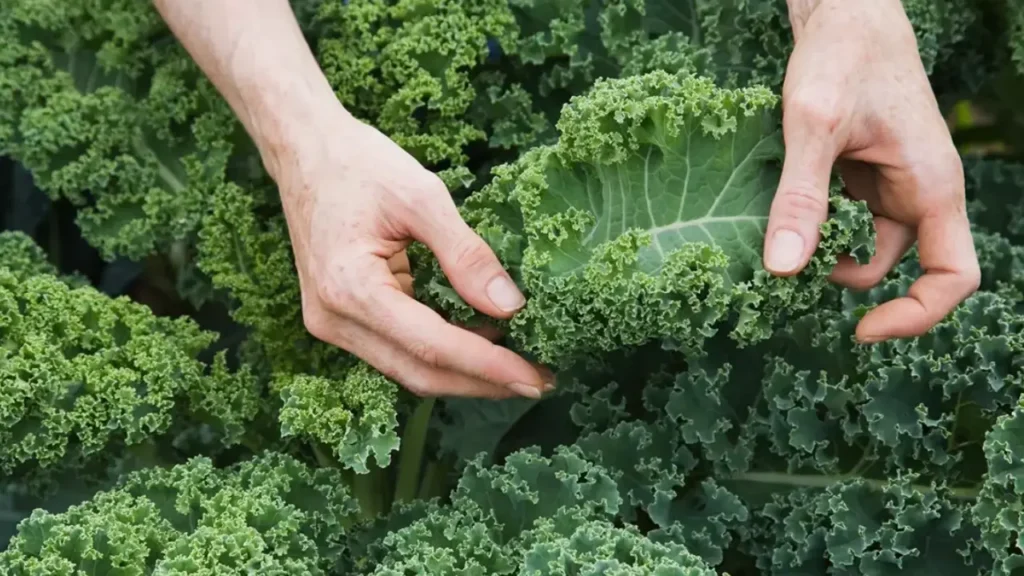
When to Harvest Kale
Now that you know how to grow kale, it is crucial to plan when to pick kale to secure the freshness and taste of the leafy vegetable. Smaller kale leaves covered with tiny wrinkles can be harvested once they reach sufficient size, with this size being about 8 to 10 inches long. Leaves should be nicely folded and fresh in color, devoid of any yellowing or browning.
Pro Tip: Constantly watch over your kale for mature leaves through folding the outer leaf backwards. When the stem is snapped, and if it breaks easily, then the leaves are ready for harvest.
How to Harvest Kale
When it comes to harvesting kale, there are two main methods you can use: opting for selective leaf or full plant herbaceous harvest.
Selective Leaf Harvest: Through this method, only certain outermost leaves have to be selected for harvesting while the inner leaves are allowed to keep growing. Begin with the elder and the outermost leaves being held in an almost horizontal position. Properly place the scissors or garden shears at the bottom of the stems where the leaves are connected and cut them off. Make sure you leave the central bud alone (do not cut or destroy it) so that a new growth appears.
Full Plant Harvest: Make sure that your harvest technique call for only one cut at optimum-size growth stage. Use a sharp knife or garden shears, just make sure you will cut the plant some part of it which is 1 centimeter above the soil base.
Storing Kale Leaves
Preservation of kale leaves after the harvest is handled by different techniques for storage to increase their life span. Use these tricks to make kale stay a bit longer in effective:
- Please remove the dead leaves or the leaves that look wilted before storing plants.
- Give the leaves a full wash under a cold running water. Make sure you remove any soil or residue. Wipe them dry with a clean towel, or I would use a salad spinner to remove the excess moisture since some moisture still remains.
- Arrange the kale leaves in a resealable plastic bag or a container with an airtight lid and the towel paper on the bottom of it. That softens the soil and saves water whose evaporation can damage plants.
- Ideally, store the bag or container in the crisper drawer of your fridge, which is where the temperatures and humidity are best suited for crisp greens preservation.
- The total time that fresh kale leaves can be stored for is about one week, but ideally, they should be consumed as soon as possible to maintain maximum freshness and rich flavor.
Adhering to the enlisted tips and tricks that will enable you to get the nutritious use out of your kale crop and savor it in different meal plans. Whether in its raw form in salads or sautés or blended in smoothies, kale’s fresh look and health benefits can only be a good addition to any dish.
Saving Kale Seeds for Future Planting
If you want to harvest and store your own kale instead of buying new seeds for subsequent years, this method of storing kale seeds is economically beneficial. With the easy learning narrative of saving the kale seeds and the best protocols on how these seeds are stored, you can be confident that your next kale harvest will overcome any growth challenge.
Process of Saving Kale Seeds
To protect kale seeds, it is vital to let the plants go to the bushes and, in turn, bloom the flowers as well as form their season. Here are a simple guide to support you and let you through this process:
- Opt for the best kale plants, that you will subsequently use for propagating. Check native plants that are drought tolerant, sun resistant, adapt to the local climate, and can grow in different soils.
- Permit the plants to explode at ending and create flowers. This is an automatic occurring method in which the plants adjust to the stage of reproduction.
- When the flowers open, their evolution is not far off after having through the process of becoming seed pods. Exercise patience and watch out for the seed pods to reach and completely dry out on the plants.
- Upon the seeds being ripe and their inner coating dry and brittle, gently remove them from the plants.
- Unlock the pod with seeds inside kale for you to make a salad with. First of all peel off the seeds from pods.
- Make sure the kale seeds is perfectly dry before saving them. Fungi like mold and mildew never thrives in dry area; hence it helps to hinder their growth.
Best Practices for Storing Kale Seeds
Correct usage of the seeds storage holds the key for your kale seeds longevity. Apply these tricks in order to keep them going as long as possible.
- Keep the seeds in a cool, dry area. Purpose on a temperature around 32 to 41°F (0 to 5°C) and a humidity level below 40 percent.
- Seals the seeds in airtight container such as glass jars or seed storage envelopes to prevent the moisture and pests access.
- Label all containers with the seed type and the date of harvest to monitor the seeds.
- Keep seeds away from heat or temperature fluctuations which can improve the viability of seeds.
Following these rules will be your guarantee that the seeds obtained from stored kale remains viable for another planting season. Proper method of saving and storing, you can be able to grow kale all year round and reap benefits by having fresh kale from your own garden.
| Kale Variety | Characteristics |
|---|---|
| Curly Kale | Provoking leaves which are not plain and bittring. Is often the most common and widely distributed, being the most-grown kale variety. |
| Dinosaur Kale (Lacinato Kale) | No frills, glossy leaves with tough surfaces. Well known for having a rather mild taste in comparison to curled kale. |
| Red Kale | Our deep purple, red or rosy leaves give extra color to dishes. Has the less bitter taste. |
Knowing the different kale varieties can help you select the types that best suit your taste preferences and culinary needs.
Troubleshooting Common Issues in Kale Gardening
At the same time, the fact is that even in your best case scenario, confronting the challenges of raising kale can be worrying. Luckily, resolution of kale common issues is possible through a thoughtful way of using it. In this fourth part, we will provide an overview of some of the gardener-specific problems when growing kale and also share relevant remedies to help you to handle the issues effectively.
Yellowing Leaves
One of the most frequently encountered problems in kale gardening is the case of discoloration, whereby leaves become yellowish. It may be due to several factors among which we can mention lack of nutrients, over watering or watering and use of pesticides. To do this just, go through the soil moisture reading and then turn water schedule after that. Make sure your kale plants get enough light because inadequate lighting causes leaves to change color and become yellow. Besides that, be sure to plant those nutrients your plants may lack back with a balanced fertilizer. Give a careful check up to your plants to detect pests and using organic pest controls whenever needed becomes a regular chore.
Plant Diseases
Kale plants are vulnerable to both types of diseases: powdery mildew and clubroot. The earliest symptom of the powdery mildew is a white powdery film-like coating on the leaves, but club root appears as a stunted growth and deformed roots. To stay away from these diseases and ensure better air circulation, don’t crowd your plants by creating a space between them. If any diseases exists eliminate and uproot the infected plants from any part of the garden that has been affected to prevent any spread of the infection. Think about kale-resisting diseases while deciding on the varieties you can use for your garden.
Other Factors Affecting Kale Plant Health
While yellowing of leaves and plant sicknesses are likely amongst the factors that can make it difficult for you to grow healthy kale plants, several other factors can contribute to the health conditions of your plants. Additionally, there are some difficulties that you are likely to come across, and this is how one of them can be solved.
- Poor Soil Quality: The plants might be stunted in their growth or might even exhibit signs of weakness if the soil in the garden is of poor quality. Through testing the soil pH, add amendments that will improve the soil nutrition for perfect kale growth.
- Over or Underwatering: Same like this stress can affect Kale too in cases of over – and under-watering. Keep track of the soil moisture always and modify the frequency of watering basing on that.
- Improper Harvesting: Using kale at the improper harvest moment due to the fact that it hinders the plant development and yield. Learn the proper way of harvesting kale to maintain the quality and flavor.
- Environmental Factors: Especially extreme temperatures or weather situations when they change suddenly these can have a detrimental effect on kale plants. If possible, do not forget to use shade cloth or row covers as the plant shields from harsh weather conditions.
Through dealing with the issues kale is prone to and applying the solutions given, your kale garden can become more productive and help you lead a healthy life in a natural way. Besides that, try to do the monitoring of your plants and always provide necessary care and adjustments as these are very important aspects to ensure you will have a good kale growing experience.
Conclusion
It is not that difficult to cultivate kale as you will see from then on. This guide provides a roadmap for creating great and nutritious kale gardening in your home. All you have to do is follow the steps in this post and your kale will grow in your backyard garden. Implement these tips, take it slow and easy, so that you also enjoy the yield of healthy and delicious kale leaves. Happy gardening!
In this guide, We have explained the importance of getting to know the types of kale you can choose, the right place to plant, how to prepare the soil perfectly, and what practices you need to make proper care for your kale vegetables. This evening we took up the subject of watering methods, fertilization needs, mulching and weeds alternatives, pest and disease prevention, harvesting and storing your kale, respectively.
Having thus got a grasp of this, you can confidently apply the information to your kale farming. Either you are just beginning or you have a little background in gardening, the steps given under and the best practices will determine the successful crop of kale. Don’t neglect to practice the process, fiddle with different types, and savor the end results of your homemade kale.
Must Read : How To Grow Lettuce
FAQ : How to grow kale
How do I plant kale?
When you want to plant kale, the soil should first be prepared and allow it to have good moisture retention capability and slightly acidic nature. Plant the seeds directly where they will grow or germinate them in a pot and transplant them afterwards. Space the seeds or seedlings about 12 to 18 inches apart depending on the type of pepper plant. Give water at regular intervals and give enough sun for the healthy growth of the plants.
How often should I water kale plants?
Kale plants having water deep into the root system can be done when the top inch of soil feels dry. Make the soil evenly moist the whole time, but pay attention and don’t waterlog, because kale prefers soils with good drainage. Regular check up of soil moisture is the right guide to set a schedule of watering.
What are the nutrient requirements for kale plants?
Kale plants need frequent supplemental feeding in order to grow in a healthy fashion. The underlying idea seeks to deliver a concise but impactful meaning. An organic fertilizer that contains equal amounts of organic materials or pin pointed organic compost can be used. Conduct the application of fertilizer as stated in the package instructions or sprinkle the compost around the plants only once or twice a month during peak growth season.
How do I protect my kale plants from pests and diseases?
Bees, snails, and cutworms are pests which may attack kale plants. Promote allowable repulsive practices to manage pests such as picking them by hand, spraying with Neem oil or using insecticidal soap. As for diseases, combine the practices of having a good air circulation, disposing off any infected, rotten, or dead leaves once necessary and the others.
When is the best time to harvest kale?
To harvest kale, the leaves should be at the stage when they are about 8 to 12 inches tall, which is desirable. Younger leaves are harvested which provide the kale with tenderness and great flavour. Trim outer leaves at reaching the base, the center stalks should remain in growing. Refrigerate washed kale for the week, storing whole leaves or torn ones.
How do I save kale seeds for future planting?
While the next step to keep kale seed is to allow the flowers of the mature plants and for the seeds to form. Next, the flowers will ripen and their pods will become brown and dry, to be collected for sowing. Gather up the seeds and store them in a cool, dry space, using an airtight container. Fighting Global Warming If the kale seeds are correctly maintained, they can be stored and be used for many years.
What are some common issues in kale gardening and their solutions?
Cheering color, which might turn to yellowish, can be a signal that the kale is affected by some nutrient lack or infestations. Deal with that by providing right nutrition and choosing biological control systems. Other communications in kale garden are the problem of bolting (when the plants are going to seed), as well as the multiplication of fungi which are managed through horticultural culture and preventive methods.