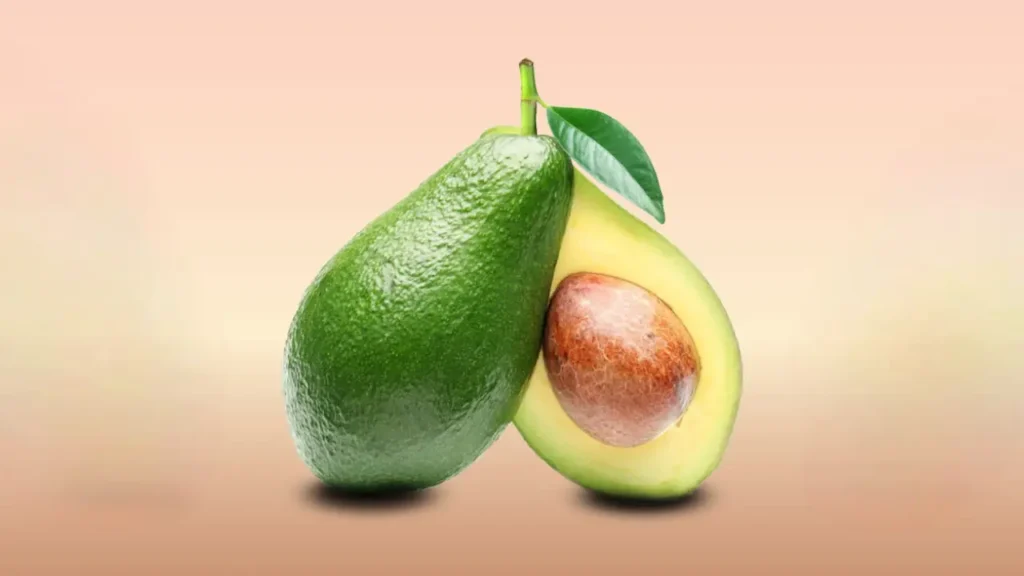
Avocado, previously known as nature’s butter, has now seen the light of being a world craze. This peculiar fruit with pears’ shape and creamy texture, as well as very delicate taste, is loved not only by the people of the world but also by their taste buds. However, avocado, together with its unique taste, wins on its nutritious content and wide use in the kitchen, and becomes a favorite not only of the gourmets but also of the fitness fans as well.
The avocado plant is a classic representative of the monocotyledon family. While an avocado may be your favorite fruit, why directly not attempt to grow an avocado plant yourself. It’s not as hard as you might think, and as long as you follow the how to grow an avocado from seed step-by-step guide that we will give you, you’ll be able to appreciate the satisfaction of growing your own avocado right in your home.
Key Takeaways:
- Growing an avocado from seed is a real achievement that clearly shows the entire process from seed to ripened fruit.
- The process of carefully choosing and preparing an avocado seed is vital for ensuring the growth to be successful.
- Ensuring that the condition of proper sunlight, temperature, humidity, and watering are created right for your avocado seed to grow well is the key.
- Caring for the seedling by ensuring the right conditions like watering, feeding, and pruning are the basic things to observe in that way the plant can maintain health.
- The best experience that self-watering avocado plant could give is when you are able to harvest and appreciate the fruits you grow willingly while cultivating them.
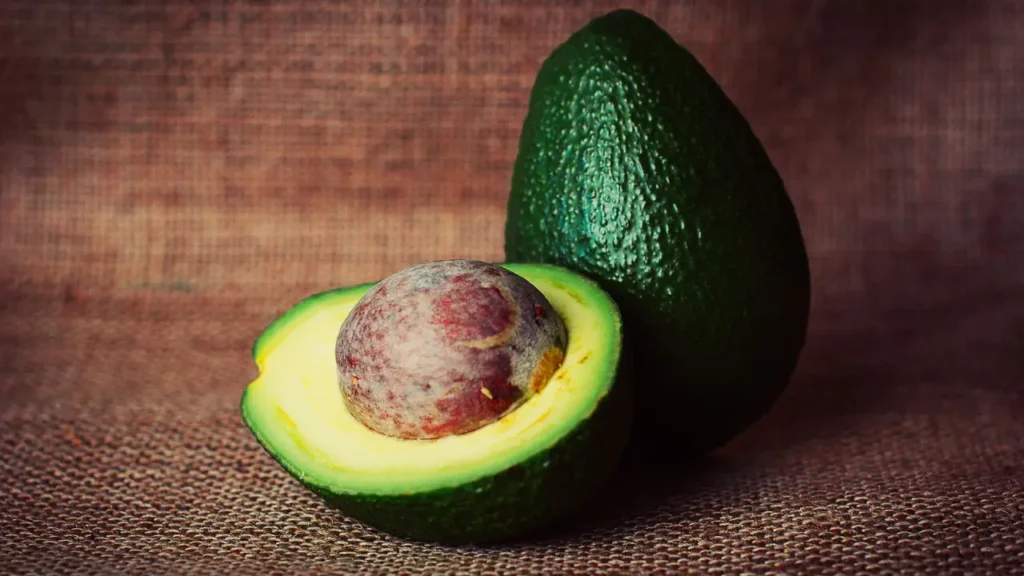
Table of Contents
Choosing the Right Avocado Seed
Planting an avocado plant is about how to make a positive start, which begins with having a good seed for the process. Firstly, choose the right avocado seed when you want the balancing process to go smoothly. In this article I will not only provide you with some essential tips on how to select and prepare the perfect seed for sprouting and germination, but my aim is to make you confident that you can deal with the process with your own hands.
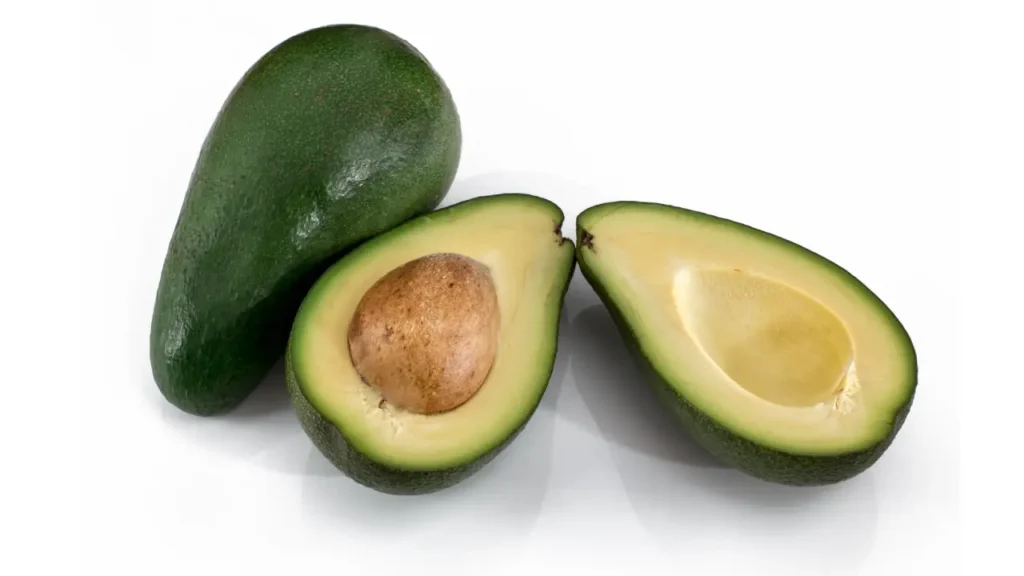
Choosing a Ripe Avocado
When choosing avocado seed for cultivation, pick one that is possessed of a full ripe state. This is simply a contrast in the shade color i.e. dark green or black; it only gets soft and tender to touch if pressed. But to be on the safe side, go away from avocados in brown-yellow state, peach flesh and mold or rot.
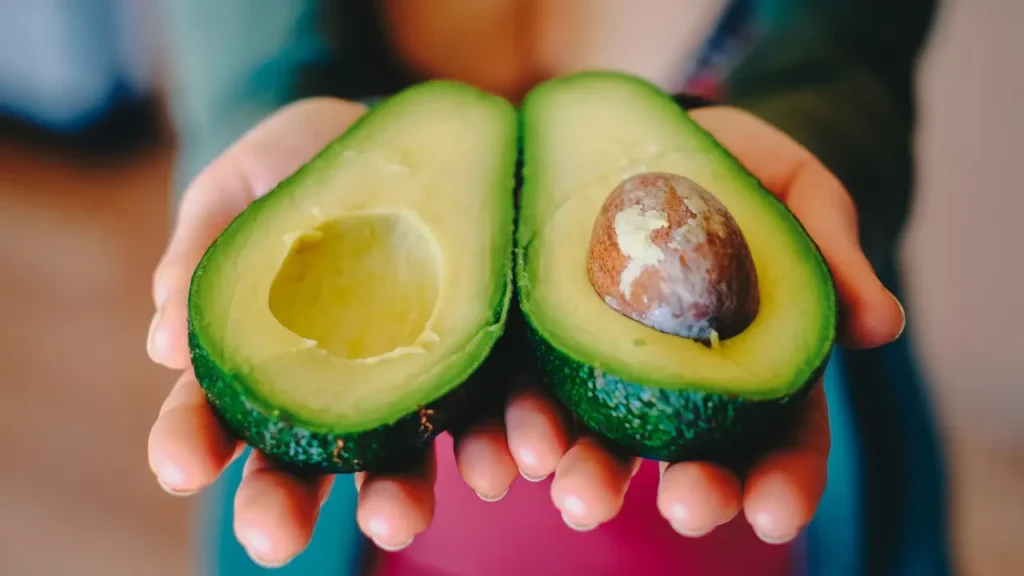
Seed Collection
After the avocado has reached its right degree of ripeness, carefully slice it into two with a very sharp knife. Take care not to slice or split the seed as it must remain undamaged for the germination process to complete. Take the pit from an avocado seed, being mindful not to damage the seed’s surface.
Cleaning the Seed
After cutting away the seed, proceed to lightly rinse the seed under lukewarm water. Remove any colored remnants from the flesh. Keep away the chemicals or soaps, which normally hinder germination. Parent the seed by using a clean towel from which you will remove every drop of water.
Seed Inspection
Look at an avocado seed closely. Be certain that it is not damaged, cracked, not moldy. Healthy seed has smooth, blemished coat. See also how the seed is positioned, because the pointed end should be on top, while the rounded end is the bottom.
Seed Activation Methods
On the other hand, there are various ways to incentivize seed germination. Perhaps the simplest method is the toothpick method. It would be nice to stick in the upper part of the seed three or four toothpicks, evenly spaced along the length of it. The toothpicks offer the necessary means of supporting the root, which is being immersed in a container of water.
Germinating the Seed
Take the avocado seed and place it in a glass or jar half filled with water. Be sure that the bottom half of the seed is fully immersed in water with the top part just above the water surface supported by the toothpick. Set the dish in a place that is warm but does not receive direct sunlight. Bacteria grows best at their own temperature range, so change the water every few days to impede their growth.
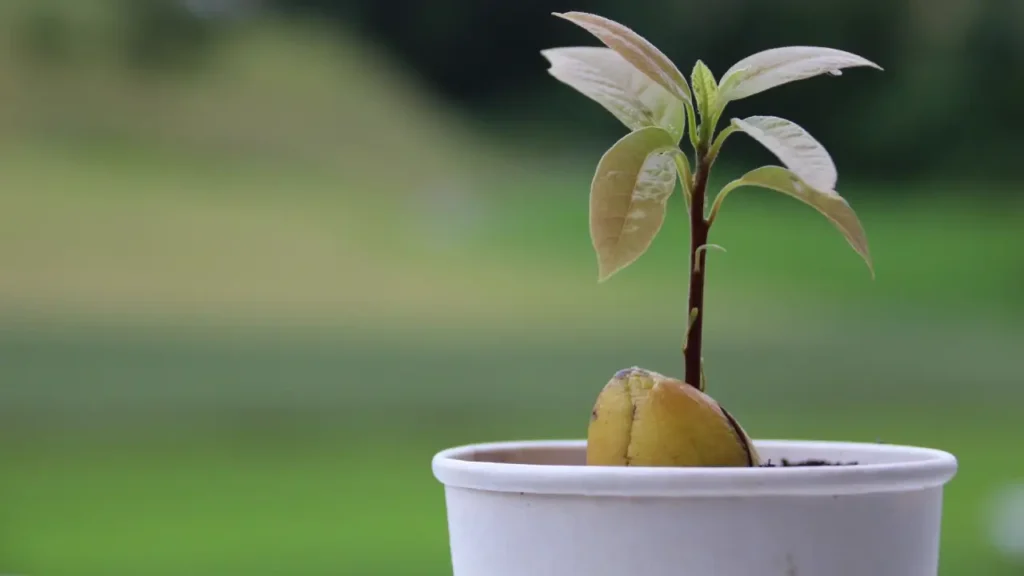
Sprouting Time
The best situation for the avocado seed to start sprouting are the warm and moist conditions which usually may take two to six weeks for the first sprout to appear. Check on the seeds’ progress regularly and if the sprouts grows to at least six inches, then you can now start to plant it in the soil for it to grow more.
Common Mistakes to Avoid
When choosing an avocado seed pay careful attention to avoid using those which are dried out or damaged and that are either under ripe or genetically modified either. These seeds could have a weaker chance of getting sprout over. Other than patience with sprouting process,it also advised not to over water,this is because excess of water can lead to its root rot.
Through precision seed selection and adequate seed preparation, you can actually enhance your chance to sprout and germinate an avocado seed. The next section will discuss the important steps to ready the avocado seeds for planting.
| Advantages | Disadvantages |
|---|---|
| High success rate | Long germination period |
| No need to purchase seedlings | Potential for transplant shock |
| Rewarding experience | Variability in fruit quality |
Preparing the Avocado Seed for Planting
Before you can begin growing your avocado plant, you need to prepare the seed appropriately which is a prerequisite for its planting. Spending some time preparing the seed for planting by cleaning, drying and making it suitable for sowing would greatly improve the chance of plant growth. Here are the best techniques to ensure optimal results:

Cleaning the Avocado Seed
Start by removing, with care, all the rest of the avocado flesh and then clean the seed thoroughly to remove any remaining flesh. The clean seed in turn if helps avoid any sort of mold, or physical obstacles that can hamper the germination. Carefully clean the seed by running it under the flowing water or by the use of a soft cloth, your fingers, to remove the part that remained.
Drying the Avocado Seed
After cleaning, leave avocado seed to get fully dry. Put it in a warm location to let it air dry for a few days under sunlight coming from the window or in the kitchen tops. Make sure that the seed has been thoroughly dried before moving to the next step.
Preparing the Avocado Seed for Germination
Before sowing, you can opt to do an scored or nicked-off act in the avocado seed to accelerate germination. With a sharp knife, make a small dent or even a cut at the end of the pointy end of the seed. This would make the roots push out smoothly as they emerge during the seedling stage.
Tip: It’s important to realize that not every sun-ripe avocado seed should be scored. Some seeds, especially large ones, germinate even without scoring, hence, this step may be done with selective seeds and even left out if needed.
Soaking the Avocado Seed
Soaking the avocado seed before planting is very important to make sure germination does not take long. Stuff a glass or a jar with the water and lower it to the water surface and partially leave it above the water. Sow the seed at its bottom and ensure the top does not get wet. Let the seed soak over 24 or 48 hours, replacing the water at intervals to prevent water from sitting still.
Fun Fact: The avocado seeds may be treated with a soak that is rein forged to exhibit any cracks or Other destruction on the seed’s surface that may not allow it to grow after planting.
Optional Pre-Germination Method: Toothpicks and Water
Preparing avocado seeds by dripping toothpicks in the water is one of the common methods. Place a couple of toothpicks around the midsection of the seed evenly spaced and use them for suspension of seeds in the horizontal position on top of a jar or a glass. Fill the pot with water, making sure that half part of seed is compounded. Water level near the lowering point the toothpicks are inserted should be just below the top.
Pro Tip: The learning method through toothpick makes it clear to observe the progress of the root growth so it is the learning activity which is both fun and educational for the kids.
Continue with the instructions reviewed herewith, and your avocado seed is ready for planting. The next part will be about how to plant the seed and to follow the day by day process of growing the plant in the optimum way.
Planting the Avocado Seed
Now you have your ideal seed, and you have successfully prepared it, it’s time to commence a new stage in which you can bring your avocado seedling to life. Apply these guidelines in order to make the pop to grow the seed of your Avocado Tree in to the appropriate environment.
Gather the necessary materials:
- A pot or container with drainage holes
- High-quality potting soil
- A clean, sharp knife
- A spoon or trowel for scooping soil
- Water
Get all the materials into your bag and start planting your avocado.
Step 1: Prepare the pot or container
Pick a pot or a container with a diameter of not less than 10 inches (25 cm) and at least bottom drainage holes. It will therefore minimize root rot incidence by diverting water away from the plant roots. The pot should be filled with good quality potting soil only leaving an inch of that is for watering.
Step 2: Prepare the avocado seed
Grasp the avocado seed in one hand, making sure you hold the wider end at the most bottom. Carefully cut a slice off the bottom (thinly) to form a flat and stable surface. While doing this, be careful not to damage the seed in the process Use a spoon or trowel to take the rest of the flesh from the seed. In either case, hands would also be much more effective, and time is saved.
Step 3: Plant the avocado seed
The potting mix should be dug up in the middle somewhere in an inch and a half of depth. The avocado seed should be inserted in the hole with the flat surface down, the naught is slightly above the soil level. With your finger tips, crack the soil and place the seed inside it but do not forget to cover it securely with more soil.
Step 4: Water and provide proper care
Once you seeded the soil, make sure to water it so evenly the whole soil is moist. Do not exceed the limits of watering been aware that it will lead to root rot. To start with put the pot in a well-ventilated and sunlit area, where it can get some of the indirect sunlight. Water the soil when it is showing a visible dryness, meanwhile making sure it does not get overwhelmed with water.
Tip: Avocado seeds, like most environmental factors, tend to be affected by the temperature variations. Make sure you do not place the pot in areas, which are draughty or in the vicinity of ventilators of the air conditioner.
Step 5: Monitor and wait for germination
Finally, you need to just wait and watch as the seedling your avocado sprouts up to fully grown tree. Anytime period from 2 to 8 weeks is needed for the seedling to appear – thus patience is needed. To promote germination, give the soil enough water, and ensure the seedlings get enough sunlight.
Step 6: Once the seedling emerges
As soon as a first small leave grows after your avocado seating has broken from the soil surface, you will have to start with a change of care routine. Start with a minimum Eco-friendly sunlight and gradually increase the amount of sunlight the plant is exposed to. Make sure to water the plant less frequently. Sprinkling the soil a little to let it dry between water spraying exercises will assist in growing strong roots.
Take note that many avocado seeds differ from each other and germination of a seed may take a different time. Keep being patient and providing the seeds with constant care, and soon you will have a promising avocado seedling ready to start the journey to becoming a splendid avocado plant.
| Common Mistakes to Avoid | Tips for Success |
|---|---|
| Over watering, which can lead to root rot | Water the soil only when it feels dry to the touch |
| Planting the seed too deep or too shallow | Plant the seed about 1 inch (2.5 cm) deep |
| Using poor-quality soil or not providing drainage | Choose high-quality potting soil and ensure the pot has drainage holes |
Providing Optimal Growing Conditions
It is very important to provide a perfect atmosphere for your avocado seed to ensure its growth into a healthy and strong plant. Pay attention to the following factors:
Sunlight
The avocado plant requires bright indirect sunlight for proper growth. Place your home avocado seedling by a windowsill on south or west side of your home which should provide enough intensity of sunshine that the seedling plant needs to grow. The sun’s rays can be too hot if the direct sunlight is intense. Therefore, the use of semi-transparent treatments or blinds can be considered for when they are needed.
Temperature
It is also vital to note that avocado plants will do much better in warm environments. Keep the temperature between 60-80°F (15-27°C) during daytime and make sure that plant is indoor to avoid temperatures going lower than 50°F (10°C) . Also remember that avocados are susceptible to cold drafts . Therefore, do not put them near air conditioning vents or drafty areas.
Humidity
Avocado plants grow well in areas with moderate to high humidity. In order to improve humidity around your avocado seed you can apply a humidifier, or simply place a tray of water close up the plant. This helps in development of micro-climate that distinctively resembles where the avocados grew in nature.
Watering
Proper watering is indeed one of the most important things you would need doing to ensure the good health of your avocado seedling. Keep the soil damped of moisture but not exuding underwater. Moisten the plant’s surface soil every time you experience a dry fingertip. Be careful not to over water or the roots will rot, and don’t under water so that it cannot grow well due to the stress.
Tip: To determined the moisture level of the soil use your finger as a probe by extending it to the depth of the knuckle. If it feels cool, wait for some time again before watering. If you notice that the soil you’re using to grow your avocado feels dry, water your avocado plant right away.
Summary of Optimal Growing Conditions
| Factors | Optimal Conditions |
|---|---|
| Sunlight | Bright, indirect sunlight |
| Temperature | 60-80°F (15-27°C), avoid temperatures below 50°F (10°C) |
| Humidity | Moderate to high humidity levels |
| Watering | Consistently moist soil, avoiding water logging |
Nurturing the Avocado Seedling
Once your avocado seedling comes up, appropriate care is essential for its healthy development. For better growth and health of avocado plant, these are the best practices.
- Watering: The growing medium of an avocado necessitate frequent watering to maintain its high moisture content. Water your seedling at depth such that the root system is reached. Yet at the same time, don’t excessively water, or you will have root rot. Check soil moisture level frequently and adjust watering schedule to requirement.
- Fertilizing: Supply the necessity for nutrients to your avocado seedling by fertilizing it on a routine basis. Choose a balanced fertilizer that is dedicated for fruit trees and comply with the manufacturer’s instruction as indicated for application rates. Use the fertilizer during the growing period, commonly from spring till early fall. But do be cautious to put a limit with the level of fertilizer as it might harm the plant.
- Pruning: Pruning is an essential practice, so that you can control the shape of your avocado plant, and to promote healthy growth. The time to start shaping your seedling after it has grown tall to between 12 and 18 inches is the next stage. Removing all weak and damaged branches and not letting the tree grow too unevenly are fundamental principles of precise pruning. Fruit trees prune not only eliminating competing plants, but also stimulating the development of lateral branches that contribute to a full and sturdy tree.
All these nurturing practices would enable you to foster the development of the avocado seedling to the point where it will be able to thrive in form of a full-grown avocado plant.
“An avocado seedling, when cared for well is the basis that determines a strong and productive avocado plant.”
Comparison of Different Fertilizers
| Fertilizer Brand | Nutrient Composition | Application Rate |
|---|---|---|
| Brand A | NPK 12-6-6 | 1 tablespoon per gallon of water, applied every 4-6 weeks |
| Brand B | NPK 10-10-10 | 2 tablespoons per gallon of water, applied every 6 weeks |
| Brand C | NPK 8-4-8 | 1.5 tablespoons per gallon of water, applied every 8 weeks |
Dealing with Common Issues
Apart from the fact that avocado plants are long-term satisfying, there are some challenges that will arise during the entire process. It is necessary to be well informed and to have the necessary knowledge to identify and resolve general cultivation’s that may pose a challenge to the yielding. In other word; it is crucial to stand ready and with knowledge to prevent the most common problems that may be encountered in the cultivation.
Pests
An avocado plant often experiences the problem of pest invasion. Pests such as aphids, spider mites, and thrips can cause damage to leaves and stems of your avocado tree aggravating the existing stresses and stunt its growth. Don’t forget to conduct a pest activity inspection periodically in your plant. Check for pale-colored leaves, leaf claws, or sticky residue.
In case there are pests, it is necessary to take the effective measures for treating it either with organic insecticides or with the methods recommended by the horticultural specialist. Using good cultural practices such as supplying plants with varied nutrients and making sure that an environment is hygienic, clean and free of pests can also help a lot in fending them off.
Disease
Avocado trees suffer from different diseases, and the diseases are also dangerous to their roots, fungus, and bacterial infection. It is one of the vital things to track your plant for the signs of wilting, yellowing leaves, or some black dark spots. In order to prevent the spread of the disease, don’t allow your plants to be waterlogged, enhance the water drainage, and give enough air circulation. When you detect a disease, the plant disease specialist should be contacted to advice on the suitable methods for treatment/interventions.
Inadequate Growth
Avocado tree may be stunted or may fail to thrive because of many reasons including not providing enough sunlight, water or nutrients. Evaluate the environment conditions, and secure that your plant get sunlight, water, and appropriate minerals. Set a watering frequency and amount of water appropriate for the type of soil, so that it is not waterlogged, but it always remain moist. Consider the option of using organic fertilizers that are tailored for avocado plants. If the situation is critical, seek a horticulturist or a professional gardener’s expert opinion or assistance to identify the related factors linked to poor growth.
It is important to keep this in mind as each challenge presents an opportunity to gain knowledge and grow further. The timely and appropriate supply of care solutions will enhance the chances of growth of an upright and topping avocado tree.
| Challenge | Identification | Prevention/Treatment |
|---|---|---|
| Pests | Keep an eye on your plant on a regular basis, looking for symptoms of pest infestation like leaves that get yellowing, getting curled, or honeydew oozing. | Treat infestation immediately through natural insecticides or as advised. Integrated good cultural practices instead of a dirty habit and be sure to keep a clean and healthy environment. |
| Disease | Please keep an eye on the plant as signs like wilting, yellowing leaves, blackened spots and so on. | Ensuring proper drainage, moderating water amount, and providing adequate airflow are some of the best practices. Seek advice from a plant disease specialist for the right treatments. |
| Inadequate Growth | Check the growing conditions – sunlight, water, and nutrient availability. | Implement hands-free irrigation, control water frequency and amount, monitor soil moisture, and add natural fertilizer as needed. Seek the help of an expert, just in case. |
Transplanting the Avocado Plant
Continuous care and nurturing of the avocado plant will eventually require it to be re potted into a bigger pot or outdoor. Planting your avocado would be highly imperative to allow it to get the space and resources it needs in order for it to keep on thriving and developing.
Choosing the right time: Transplanting your avocado plant should be done when the plant outgrows the current container or when the weather is comfortable for outdoor planting. Prefer not to transplant when it is too hot out or when the plant is actively fruiting.
Preparing the new home: Just before planting, you need to make sure that the the new container or planting site is prepared. Select a preferable container or outdoor location, depending on your wish, which offer good space for the roots to grow. Make sure that there is enough drainage to avoid water logging which might be harmful to the plant. Use a good quality loamy soil or potting mix with good drainage.
Transplanting technique: Here is a step-by-step guide to safely put your avocado plant.
- Mildly remove the plant from its present container by avoiding to eliminate its roots.
- Loosen the roots by teasing them gently with your fingers, which will ensure the right amount of growth.
- Place the plant into the container or the new hole carefully, adjusting the depth of the plant if necessary.
- Fill the container or the hole with soil, pressing the soil firmly around the roots to avoid air pockets.
- Properly water the plant, make sure the water is able to penetrate the all the soil completely.
- The monitoring should be done prior and through the days following the transplant. Make sure that it is exposed to sunlight the whole day, it gets enough water, and it is provided with extreme temperature protection.
Care after transplantation: Later on, transplant your avocado plant and ensure all the essentials needed to its proper care. You can periodically monitor the soil moisture and adjust it whenever necessary. Make it slightly damp, but not too wet. Do not shower more than the plants can consume, flower root rot can occur. Keep up a constant warm temperature, provide enough natural sunlight or artificial light if indoors.
The proper tactics and supervision will ensure that your seedling continues to flourish and blossom into a shiny avocado. Then you get joy and satisfaction from the work that you put into it.
Expert Tip:
“The types of containers you need to choose will depend on the plant you are going for. If you will like to try growing avocado plant, go for one that is at least 2x-3x bigger than the current container so that your plant can develop a good and healthy root system.” – Melanie Green, Horticulturist
| Transplanting Checklist: | |
|---|---|
| Choose the right timing for transplanting | ✔ |
| Prepare a new container or planting spot | ✔ |
| Gently remove the plant from its current container | ✔ |
| Loosen the roots and place the plant in the new container/hole | ✔ |
| Backfill the container/hole and water thoroughly | ✔ |
| Monitor and provide proper care after transplantation | ✔ |
Pruning for Shape and Health
The right pruning is an integral part of keeping avocado tree looking beautiful and staying healthy. Through being inform about the various techniques and knowing when to prune you will be able to foster vigorous growth and fruit development.
Often, avocado trees develop a bushy and dense structure if they are left unmaintained and hence leads to obstructing air circulation and sunlight infiltration. The pruning process consists not only in removing leaves or branches, but rather in opening up the crown, easing air flow and light distribution in the tree.
Pruning Techniques
Throughout the process of avocado tree pruning, you there are some techniques you need to keep in mind.
- Thinning: This entails of removing one or several branches or large limbs that interfere with air movement. This in turn thins out the stand and lessens the overcrowding. In addition, cut off the branches that are dead, distorted, or crossing.
- Heading: Topping is all about pruning an uppermost part of a branch(also referred to as the tip) to give birth to lateral growth and a better branch arrangement. It promotes an arched, dense growth of the tree.
- Reduction: Sometimes, avocado trees grow higher than they should or larger than necessary, hence, just like other pruning, reduction pruning can be used to minimize their size. Gently trim the branches to attain the preferred height and broadness.
Don’t forget to use sharp, sanitized pruning tools always, aiming to make clean cuts or reduce the possibility of disease transmission.
When to Prune
The most convenient and timing for pruning your avocado tree is during the time just after winter and early spring, before new growth starts budding. This let tree to be on the mend and make its way to recovering more properly. Steer clear of trimming your bushes during the colder months or during the actual growth time, because it can stop fruits from forming.
Note: In case during the year you are aware of the presence of dead, diseased or damaged branches, you must remove all of them at once as while doing so you can protect a plant from further spreading of diseases or considerable numbers of pests.
“Trimming your avocado tree is like a haircut for it. It’ll keep the tree in good shape, stimulate growth, and make your tree stronger and more productive.”
Recognizing Avocado Flowers and Fruit
Avocado trees are famous for their charming flowers, which transforms to the mouth-watering fruits we all know. Through recognition of developing flowers on your avocado tree, and by understanding what stages are required to go through before real fruits are available you can predict when your avocados will get ripe.
Identifying Avocado Flowers
The petals and colors of avocado flowers come in numerous different species since the plant is genetically diverse. They are beautiful vines that flower during spring thousands they have unique structure that is different from the others.
Avocado flowers are small and typically have greenish-yellow hues. They grow in clusters along the branches or along the axils of leaves. Each flower consists of six petals, with three outermost petals called tepals and three innermost petals that are usually smaller and more colorful.
Understanding Fruit Development Stages
Process of avocado fruit development goes through a number of characteristic separate stages, where these distinct stages have specific appearance changes and textures. Through such knowledge, you will be able to follow the avocado plant growth and predict the approximate time of the fruit harvest.
- Flower Stage: This is the first time when avocado trees started flowering. During the first day, flowers remain closed and seem gray and dull on the outside. However, they progressively open up to reveal their amazing colors.
- Fruit Set Stage: Unlike in flowers, then the successful pollination, they proceed to baby fruits. Over this period you could detect fruits expanding in size and being visible as peaking through foliage on a tree.
- Young Fruit Stage: In this stage, avocados plants develop fruits that become richer and more well-defined in shape. They are still green and hard to the touch.
- Ripening Stage: The fruits will develop different color shades reflecting the type of variety. Usually fruits start to mature from a green color to shades of dark purple, black or brown. This characteristic also shows softer texture, which is a signal that fruits are suitable for picking.
Avocado Fruit Development Stages
| Stage | Description |
|---|---|
| Flower Stage | Avocado flowers are closed and gradually open up to reveal their vibrant colors. |
| Fruit Set Stage | Successfully pollinated flowers begin to develop into small fruits. |
| Young Fruit Stage | Fruits continue to grow, becoming more defined in shape and remaining green and firm to the touch. |
| Ripening Stage | Fruits change color, becoming softer and indicating they are ready for harvest. |
Over time, as you see the flower buds and fruits on your avocado tree, you will develop a greater understanding of it stages. With the knowledge you’ve gained you’ll be able to plan for future avocado production and you’ll be guaranteed to have fresh avocados from your garden.
Harvesting and Enjoying Your Avocados
Being very proud, you have taken care of the plant for months and, at last, there come the moment to pick and taste your fresh grown avocados. However, the main question here is: when do you understand that they are ready to be picked? Let’s focus on the signs of ripening to make certain that you pick your avocados exactly when they reach their peak.
Color and texture: Rip avocados have a dark violet or even black color that reflects the maturity of the fruit, while the green color denotes that the fruit is likely to gain more hue as it gets riper. Squeeze the avocado very gently – it must have a slight yield without being mushy or hard.
The stem test: To determine if the avocado is ready for harvest pinch at the end of the fruit stem gently. Should the stem base have a blackish colour, the avocado is not ready yet. The avocado is overripe if it’s brown. On the other hand, if the area is golden yellow then you must be gratified! Your avocado is now perfectly ripe, matured and ready to be harvested to enjoy.
Proper Harvesting Techniques
It is a very basic but highly important principle to use the uppermost precautions when picking avocados, as they are vulnerable and can have damaging effects on the tree. Apply these amazing techniques for a result-oriented harvesting.
- Cut the stem through at the heel of the fruit using the pruning shears or a sharp knife, and take care to make a neat cut. Don’t pull the avocado off the tree or don’t twist it else you will damage the fruit.
- Keep avocado in palm of your hand while being very careful to prevent bruising and avoid dropping it.
- After harvesting, put the avocados inside a basket or container that have soft material like a towel or bubble wrap inside of it to prevent the avocados from being bruised.
Ideas for Enjoying your Homegrown Avocados
Finally, you’ve completed the avocado-growing process, and it’s time for you to enjoy fruits of your hard effort. Thus, some ideas of how to love your home grown avocados.
- Guacamole: Make your avocados ripped just enough and mix them in with some fresh lime juice, garlic, tomatoes, and cilantro to have this lip-smacking, scrumptious guacamole.
- Avocado toast: Put spread around half a ripe avocado on toast and finally add your favorite seasonings such as salt, pepper or chili flakes for a simple, but so satisfying meal or snack.
- Avocado salads: Slice your avocados and introduce them into salads for a creamy and nutritious component. They go perfectly well with a mix of some greens like from a romaine lettuce and cherry tomatoes with a slightly sour sauce.
Be creative with your avocados in the kitchen, being open to prepare different sorts of recipes. Create your own recipes and expand your culinary horizons. Finally, your homemade avocados can take you to places you haven’t been before.
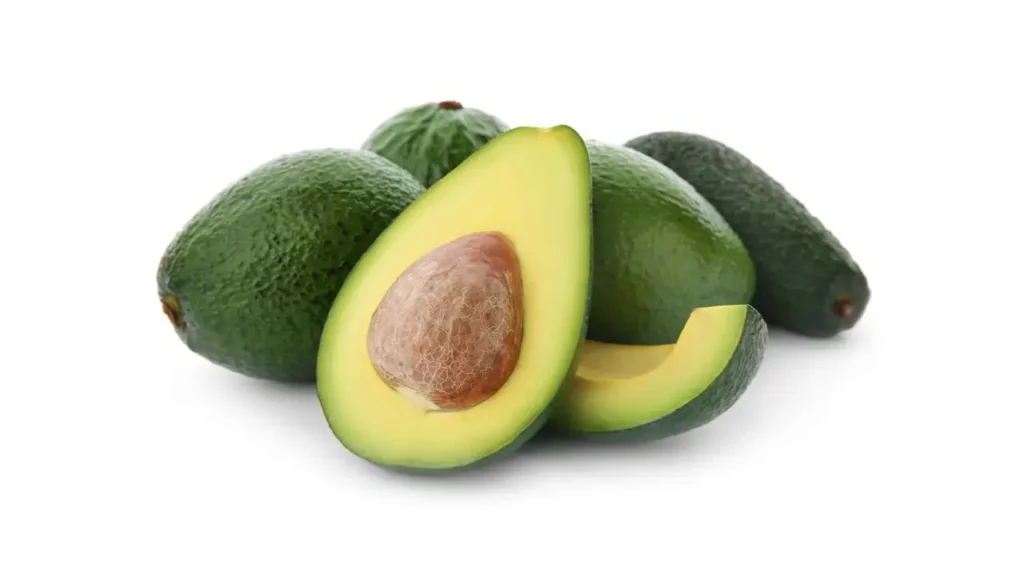
Avocado Varieties and Growing Tips
With avocados, there are so many several diverse varieties to pick from. All types contrast amongst each other in the angle of taste, nature, and growth. One way to realize the highest chance of home planting success is to select an ideal avocado variety to match home-grown conditions. List of common types of avocados including their distinctive characteristics will follow.
| Avocado Variety | Growth Characteristics |
|---|---|
| Fuerte | Medium-cold tail, medium fruit size with shinny and slightly greasy skin and creamy taste. It has a unique and great flavor, which makes it an ideal plant for home gardening. |
| Hass | It is the most frequent grown avocado variety due to its rough outer skin as well as dark colored surface and creamy texture. It is a nutty-flavor one and especially the guacamole. |
| Reed | A large-sized avocado type with a coarse, green coating on the outside and a creamy taste on the inside. It is a good mild taste and it’s excellent for just appreciating it fresh or using it in salads. |
| Zutano | First of all, early-maturing variety, and its skin is thin and bright green in color with mild flavor. It gives way to high yields of fruits therefore it is perfect for use in areas with cooler temperatures. |
Not just choosing the right avocado variety but also taking the general measures below is a meaningful step towards growing avocados by yourself.
- Select an area that gets plenty of sunlight and protect it from wind, for instance, against northwestern winds.
- Achieve a well draining soil with water pH maintaining between 6 and 7.
- Make sure to water your avocado tree frequently, especially in time of droughts.
- Apply a well-balanced organic fertilizer to improve nutritional status and growth.
- A tree requires more attention when it is young. Thus, make provisions to protect your avocado trees from frost in particular, now that it is still young.
- Thin your avocado tree not too much to keep it in desirable shape and promote airflow throughout.
Consequently, following those tips as well as the right avocado choice according to your specific local climate and taste will dramatically increase the success of your crop and the feeling that accompanies being able to enjoy the avocados that you grow yourself.
Troubleshooting and Frequently Asked Questions
The avocado from seed will be the first one you may start to cultivate. At this process, you may discover some problems. In this section, we are going to look at whatever issues avocado cultivation faces and that give you answers to your common questions so that you can get over any problem you might meet on the way.
Troubleshooting Common Avocado Cultivation Problems
If you meet an unfavorable situation with your avocado plant, please check the table below to find out the problem and possible solutions.
| Problem | Solution |
|---|---|
| Poor Germination | Make sure you use the seed from a fresh avocado that has not yet begun the life cycle. To confirm a seed’s viability, do a quick test by shaking it, and if you hear a rattle inside, it may not be worth growing. |
| Stunted Growth | Observe good growing conditions using direct sunlight, regular watering, and adding nutrients to the soil. Adjust the watering frequency if there is a need. |
| Yellowing Leaves | In some cases yellow leaves can mean this plant is over watered or it is less of a nutrient it needs. Consider planting in raised beds to ensure proper drainage and refrain from fertilizing more often. |
| Pest Infestation | Inspect your avocado plant frequently for the telltale symptoms of pest including the aphids or spider mites. Consider using pest control methods that are organic in nature or consult with an expert in such instances. |
| Leaf Browning | The browning leaves could be a sign of under watering or excessive sunlight. Change your watering schedule and give shades to the plants areas at the hottest times of the day. |
Remember that there is no a fixed method and that sometimes you will have to try different things before you find the one that will give you the desired result on your situation. No matter how many failures you experience, always be patient about your avocado plant’s development cycle, and don’t give up.
If no question on your mind is getting addressed here, our service experts are there to help and guide you through the process. Visit them for a tailor-made advice. This is what our mission is all about – supporting you on the journey towards becoming an avocado grower!
Must Read : How to Grow Broccoli
Conclusion
Eventually, the avocado seed sprouting measurements are one approach you can use to grow an avocado from seed; ultimately, you will have the joy of enjoying homegrown avocados. You can care for your avocado for all season and you can harvest a tasty feast in the future if you follow the specific instructions and apply the right care. Do it now and begin to produce great avocados!
FAQ : How to grow an avocado from seed
How do I grow an avocado from seed?
Planting an avocado from a seed is an easy and enjoyable activity. The first step is to extract the seed from an avocado that is ripened, it should be then clean and dry it. Then, use toothpicks to pierce all seeds gently and let them hang into a water-filled table, being careful that the seed part facing the bottom is fully immersed in the water.
Place the glass at a warm and bright location and change the water at least after some days every time. A month two the remains, the plant will develop a set of roots and a stem. When a stem has given you about 6 inches, transplant the seedling in a pot with a soil that drains well. Take care for it as it keeps on growing.
How do I sprout an avocado seed?
To grow an avocado seed, very gently separate it from a ripe avocado. To begin, remove any dirt or residue from the seed by carefully rinsing it. Then, using a toothpick, make 3-4 holes around the middle of the seed where the toothpicks will be attached and hang the seed from a glass by virtue of these attachments. Ensure with a twirl the bottom part of seed becomes immersed in water and place the glass in a warm, sunny area. Changing the water every several days and watch for roots to emerge and an stem to show up, which will happen approximately after about two weeks.
How do I plant an avocado seed?
Pick a clean, dry avocado seed after you have gathered it from an avocado. Softly remove the bits of toothpicks that may be around the growing of roots without wrecking them. Pick a pot that is well perforated at the bottom and place the seed in a hole that has a diameter exceeding the seed diameter. Put the seed into the growing medium with the root end down and the cap end upper. Water the soil deep enough to wet the roots, but don’t saturate them. Put the pot in the preferred warm and bright place with the soil that should be somewhat moist but not soggy.
How do I germinate an avocado seed?
Growing of avocado starts with suspending the seed over a glass of water in order to sprout it. After that, the roots will gradually develop as the plant draws up the moisture necessary for its survival. Provide a warm and sunny positions for the glass and replenish the water weekly to keep away from stagnate aged water and mold formation. In just a couple of weeks, a seed may be seen developing the system of roots and stem. As then it is clear the seed started sprouting and germinating.
How do I propagate an avocado seed?
Growing an avocado tree from a seed is as easy as planting the seed and allowing the growing conditions to move along. If your seed is clean and dry, plant it in the soil that drains well in a pot, making sure that the root is in the down and the pointed at the top. Water soil well enough and try not to over water but put the pot in sunny, warm place. Carefully and slowly, with your attentive treatment, your avocado seed will grow into a proud plant.
How do I raise an avocado plant from seed?
Raising an avocado tree that has come from seed needs adequate attention and devotion. After planting the seed in a pot with good drained soil, put it in a warm place with enough sunlight. Make sure to explore the water the soil with a brightness keeping it moist but not waterlogged. While providing sufficient sunlight, temperature and humidity the plant will continuously receive, the process of its healthy growing is promoted. Fertilize the plant routinely with a balanced fertilizer and prune it to keep its shape intact and enhance its growth.
How do I grow an avocado plant?
An avocado plant will be raised from a seed in a pot full of good-drain soil; and with right arrangements, it will grow. Ensure the plant with appropriate light, temperature, and the water that is required to for its growth. Prune the plant to make it recognized its shape and to avoid distortion of growth. While time and care grow your avocado tree into a successful production your humble farm will be blessing you with tasty homegrown avocados.